spring summer flower bulbs
September 1st 2025 Blog

Difference Between Spring and Summer Flower Bulbs

Flower bulbs are often discusses in two groups, Spring and Summer flowering, for convenience, regardless of the type of bulb / corm / rhizome. Spring bulbs are mainly planted in Autumn, and Summer bulbs during the growing season from mid-Spring. Spring-Blooming Bulbs: Always Winter hardy. Planted in Autumn to bloom the following Spring (unless planted ‘in the green’ in Spring) Maintenance: None, unless old clumps need division. Most will bloom annually, some for many years. Examples: Allium, Anemone, Bluebell, Daffodil, Hyacinth, Snowdrop, Lily, Tulip Summer-Blooming Bulbs: May need protection in Winter. Planted in Spring to bloom that Summer Maintenance: Can be treated as annuals or dug up and stored in a frost-free area over winter for replanting the following spring. Many varieties survive Winter under mulch. Examples: Dahlia, Canna, Gladiola, tuberous Begonias.
Read More
types of flower bulb diagram
September 1st 2025 Blog

Types of Bulb

Gardeners refer to several distinct plant structures as flower bulbs in everyday conversation. True bulbs – Rounded, pointed top, flat base where roots grow: Allium, Anemone, Bluebell, Daffodil, Hyacinth, Snowdrop, Lily, Tulip Corms – Similar to bulbs, with buds on top and roots from the base: Crocus, Gladioli Tubers – Swollen roots like Dahlia, or swollen stem bases: Cyclamen, Aconite Rhizomes – Horizontal, swollen stems, growing on or just below the soil: Bearded Irises, Lily-of-the-valley, Cannas From a planting season perspective, bulbs / corms / tubers / rhizomes are handled one of 4 ways: Dry, dormant bulbs are planted in Autumn A limited range of bulbs are planted in growth (In the Green), in early Spring Tender species like Dahlias are best planted into warm soil in late Spring Some late season bulbs like Nerines and Colchicums can be planted until the end of Summer For convenience, flower bulbs are commonly classified as Spring or Summer flowering.
Read More
flower bulbs stored in a box
September 1st 2025 Blog

How do I store garden bulbs before planting?

If you can’t plant your flower bulbs promptly after delivery, you will need to keep them somewhere suitable to prevent them from rotting or sprouting. This advice applies to any bulb when we deliver it to you, and there is a delay in planting. It is not advice about lifting and storing bulbs that are already growing in your garden. Most bulbs stay in the ground forever after you plant them: the big exception are Tulips, many of which are typically lifted and stored each year (if that sounds like too much hassle, simply use our naturalising Tulip mix of extra tough varieties). Dry Bulbs (Autumn Delivery Only) When your dry bulbs arrive in Autumn, planting them out promptly typically gives the best results, but they will be happy waiting a while in a Cool, Dry and Dark place. The enemies of a stored dry bulb are freezing or warm temperatures, light, and damp. Bulbs In the Green (Spring Delivery Only) Plant these out ASAP and do not store them: they are in growth and will perish if they can’t establish new roots promptly.
Read More
planting-potted-plants-depth1
Planting
September 1st 2025 Blog

The Key Last Step When Planting Potted Plants

After you plant a potted plant like Lavender out in your garden or a larger container, the top of the potting soil should not be visible. The rootball should be covered by a thin layer of the new soil, no more than 1 centimetre. That 1cm is not including mulch, which is mainly spread over the immediate area. Don’t worry about soil getting close to the trunk at this minor depth, one centimetre is not enough to damage the trunk. To be clear: Up to 1cm of soil piled against the base of a young woody plant’s trunk is no problem. 10cm of soil piled against the base of a young woody plant’s trunk is likely to kill the trunk and often the new plant. The exceptions can set new roots from mature wood, e.g. rose bushes, buddleja, and elder can all be planted deep. Burying a potted plant’s rootball properly: Keeps the sun and wind off, like a jacket against water loss. Releases a small trickle of nutrients when watered, washing local soil particles down onto the roots, which is what roots like. Gives soil life a surface to live under, right on top of the rootball. Soil life lives underground, studies show. Can’t hurt with stabilizing tall plants a little against wind rock, but obviously not a replacement for a support stake. This Means That Classic Planting Advice is Off By One Centimetre We have repeated this advice ourselves: “Plant a potted plant in a hole the same depth as the rootball. Don’t bury too deep!” The Old Me, Poor Innocent The perfect planting hole is one centimetre deeper than the rootball is tall, so when you sweep the local soil over it, it’s flush, not raised, which would shed water, and to an extent mulch if there is enough of a mound. Thanks for Telling Me, Now I Have to Replant My Plants Do not replant your plants! Just mulch them and they will be fine. Note About Rain and Planting Depth Gardening is all context: what do you want to achieve, what are your local growing conditions, and what mulch is available, if any? If your soil is wet through the year, you might make ridges and mounds for planting into, so the base of the rootball is sitting on top of the native soil. If mulching, ideally use a mix of whatever organic matter with gravel and/or sharp sand to hold less moisture. If your site is really dry and/or free draining, you might plant into a 2-inch depressions, so the surround soil forms the rim of a little bowl to catch rain. Mulch is recommended, ideally woodchips or grass clippings. Manure is good too: horse, pig, rabbit and chicken must be composted, ruminant manure like cow and sheep can be fresh. Finally: Watering New plants all need watering in dry weather, even if they are drought tolerant when established. When watering most new plants with a hose or drip irrigation system, perhaps using handy reusable porous hose, it’s key to avoid overwatering. Water deeply, then allow the soil to breathe air for a few days, until the top inch really dries. If you’re watering with watering cans & buckets then it’s hard work to overwater, enjoy the exercise and don’t bother watering damp soil!
Read More
Ghost rabbit in a spooky hedgerow
September 1st 2025 Blog

Ashridge: A Rural Nightmare Audiodrama

Tony Walker’s chilling series of supernatural stories is set in the probably fictional town of Ashridge, which we hope doesn’t exist just down the road from us in Castle Cary Ashridge: A Rural Nightmare is an eldritch horror series with an old school BBC synthwave West Country tunnel vibe. For the best frightening effect the episodes should be enjoyed from the start, in order, late at night. You can get all of Tony’s ghost stories on Patreon, follow him on Substack, and buy his Haunted Castles: Four tales of castles, Gothic horror, false wives, and treacherous husbands on Amazon.
Read More
standard-tree-sizes
September 1st 2025 Blog

Standard Tree Definition

Table of Contents What is a Standard Tree? What is a Half-Standard Tree? What is the difference between Standard Trees and Saplings?Which size of standard tree should I buy? What is a Standard Tree? A standard tree is measured by its girth in CM at 1m above the ground, not by its height. It branches at around 1.8m What is a Half-Standard Tree? A half standard tree branches at around 1.2m – 1.5m. This size is popular with garden fruit trees. What is the difference between Standard Trees and Saplings? Standard trees are measured by their girth 1 metre above the ground, and young saplings are measured by height.Therefore, a 6/8cm Standard tree is much bigger than an 60/80cm sapling tree or hedge plant. A full standard tree, known as a standard, with the unfortunate industry abbreviation std, has a clear stem at least 1.8 tall before it branches. It is typically at least 2.5 metres tall, however, unlike younger trees listed in the Hedging & Saplings section, full standard trees are not graded by their height, but by their girth in centimetres at 1 metre above ground level. Therefore, a 6/8cm girth standard tree is taller than the same tree sold as a 60/80cm tall sapling. A half-standard tree (which is also a popular option for fruit trees) has a clear stem 1.2m – 1.5m tall before it branches. A quarter-standard tree has a clear stem under 1.2m tall before it branches. A “feathered” tree (abbreviation: fth) has branches all the way down close to ground level, and is typically measured by its height. Trees of the same grade will be roughly in proportion when planted. Which size of standard tree should I buy? We mostly deliver two sizes of standard: 6/8cm Girth = Light standards: cheaper & easier to care for, tend to establish even better. 8/10cm Girth = Regular standards: instant impact, good aftercare (watering) is even more important. We generally recommend the 6/8cm girth light standards, especially for larger planting projects. Conifers and many evergreen trees are sold in the small sizes that establish best, the only tall evergreens we deliver are rootballed Yew and larger potted privet. It is always vital to water new trees during their first summer, but smaller trees are better at coping with “low” maintenance. If you need instant impact, or if you are only planting a few trees in a location where they will be well looked after, then go for the 8/10cm girth regular standards. Standard trees are larger, more mature, grown and selected for the straightness of their trunk and high branch formation. They give you instant impact. Young sapling trees from the hedging section can be trained into standard trees, given a few years and usually some pruning to ensure they have a single, straight trunk. The named, ornamental cultivars of a given species are typically only available in standard sizes.For example, you can buy wild Field Maple, Acer campestre, as both young saplings and large standards, but you can only buy an ornamental Maple variety, say Acer campestre ‘Royal Ruby’, as a standard.
Read More
Sweet pea seedling plants in jumbo plugs
Spring
Sweet peas
September 1st 2025 Blog

How to Plant Sweet Pea Plugs

Planting sweet pea plugs is easy, all you need is some nice rich soil, a sunny spot, something for them to grow up. Plant them a centimetre or two deep, so that the soil just covers the base of the stem, which will set root and give you a stronger, more stable plant. You will need your Sweet Pea plugs, some bamboo canes, compost, and water. TRANSCRIPT Here they are, sweet peas grown in plugs – terrific root development – look at that, absolutely super! They’re going to get to a metre and a half plus, I would think.So the compost has been dug-in, and I’ve made a wigwam out of old bamboo canes. They’re plenty tall enough, as you can see they go well above the top of the fence, which is 2 metres. I’m going to plant 2 plants to each bamboo cane. There are 6 in there, so that’s a dozen plants.Okay, so I’m holding the sweet pea plug a little awkwardly because I want to show you how deep you plant them. It’s quite difficult once they’re in the soil.If you imagine that the finger that I’m touching with my thumb is the soil level when you finished planting. That’s about as shallow, I emphasize shallow, as you want to plant them in the soil. If I go a little higher, like this, so that’s fine. Sweet peas will make roots along the stems that have been buried, which will speed up their growth and make them more resistant to drought. Although it’s just been raining very hard indeed, so that isn’t a thought at the front of anybody’s minds, and you’ll get more flowers out of the sweet peas if you do it that way. This also notice, has been stopped, you can see where the second shoot has come out at the bottom. I’m quite tempted to take them back to probably where that thumb is and up to about there. Just to make sure that there aren’t any little baby flower buds lurking somewhere in the tips because I want plenty of growth before it breaks into flower.Hopefully you can see that it’s actually quite deep. There’s the soil level where my spade is, so the soil is going to come up to there when they’ve been planted, and I’m going to shorten the side growths. So ideally I’ll make sure I leave some leaves above the ground for the plant to breathe and work out which way it needs to grow.The first one has been planted and looking at it more closely, you can quite clearly see there’s a flower bud forming in this tip here. So I’m going to take that off like that. It’s been cut back and should grow nicely from there. So they’re all planted – there they are, snuggled up and cut back – just the tops taken off just to make sure we don’t get flowers too soon. The leaky hose looks as though it’s being planted as well – don’t think we’ll need that today or tomorrow, as the ground is very wet.With a bit of luck they’re going to get up to there I hope, over the course of the next 6 weeks or so and will be flowering as they go. When do I plant sweet pea plugs outside? You can plant out your sweet pea plugs after the last frost, which should be between mid-April and mid-May in most of the UK, but often later in Scotland’s coldest inland regions. If you are growing your own sweet peas from seed, it’s best to harden them first. Simply put them out during the day, then put them back under shelter at night. This is not necessary with the sweet pea plugs that you buy from us, which have been “grown hard” and so are ready to go outside as soon as the frost has passed.
Read More
cats-dogs-lavender-plants
September 1st 2025 Blog

Lavender Plants are Safe for Cats & Dogs

Confusion exists around lavender plants and pet safety: there is no risk at all from the plants in your garden or windowsill. Are Lavender plants Safe for Cats & Dogs? Yes, lavender plants in the garden, or harvested and dried, are safe for cats & dogs. Some pets like the smell of Lavender, others may avoid it. Is Lavender oil Safe for Cats & Dogs? Processed Lavender oil is not toxic, but direct contact with pure oil can be irritating, even distressing to pets. However, dilute lavender oil is used in some pet health products.
Read More
perennial-plant-season-time
Planting
September 1st 2025 Blog

Herbaceous Perennial Planting Seasons

When is the Best Time to Plant Perennials UK? Mid-Spring and early Autumn are best. Summer is fine, especially in the shade. Winter often leads to plant failures or setbacks. Autumn and Spring are both ideal for planting perennial plants, allowing for strong root development and healthy growth. Dates will be earlier in the South West, later in cold Northern & Scottish regions. Early Autumn (September-October) Warm soil promotes root establishment before Winter Those new roots can take advantage of warm spells Strong spring growth results Spring to early Summer, (late April-June) After frost, as the soil warms to about 10C, Midsummer (July-August) In Shade: Fine In Full Sun: With careful watering, possibly shade cloth, usually fine, just don’t plant in a heatwave Avoid over or under-watering Winter (November-March) Generally avoid planting herbaceous perennials Risk of rot or stunted spring growth Better to overwinter in their pots in shelter, plant in Spring On the other hand, Winter is bareroot planting season for woody perennials like trees, roses, and hedging What is a half-hardy perennial plant? These plants tolerate light frost, and generally survive outdoors with winter frost protection like mulch. A prolonged deep freeze is likely to kill them. Most perennials we grow are fully hardy and live outdoors year round across the UK.A tender perennial will not survive even a breath of frost, so either it can be brought inside for winter (like Dahlia tubers often are), or moved to shelter if grown in a pot. A half-hardy perennial (HHP) is sort of a fake, in-betweener category caused by growing plants from warm countries in the cooler UK climate: Pelargoniums and Fuchsias are common examples. It’s not a fixed category, because it depends on your local conditions and the microclimate where it grows: in the warm South-West of England and Wales, some tender perennials “become” half-hardy. They can withstand a light frost, and will generally survive outdoors in winter with good frost protection such as a pile of straw, mulch, or horticultural fleece, but a prolonged deep freeze may still be too much.Dry soils are typically best for overwintering half-hardy perennials. Tips for First-Time Perennial Planters Know your soil type, pH, how much light the exact planting site gets in Spring-Summer, and how wet it gets in Winter. Choose “right plants, right place”, rather than thinking about big changes to the site. If plants you like aren’t suitable, search for alternatives, which may be a combo to get the desired leaves and foliage. Space plants according to their mature size, some like a bit of legroom. Water thoroughly after planting. Mulch retains moisture and suppress weeds. Label plants or make a real scale map. Be patient, perennials often take a year to establish and flower properly.
Read More
perennial-flower-border
September 1st 2025 Blog

Perennial Plants: Flower Borders & Bedding

Table of Contents What are Perennial Plants? Using perennial plants in your garden What are Perennial Plants? A perennial plant lives for three plus years. Trees and shrubs are woody perennials.In everyday garden use, perennial refers to herbaceous (non-woody) perennial plants. A perennial plant lives for three plus years. Trees and shrubs are woody perennials. But in everyday garden use, perennial refers to herbaceous (non-woody) perennial plants. These produce new, non-woody growth from ground level every Spring and die back in Winter; in some cases, attractive dead stalks are kept for late season interest. Evergreen herbaceous perennials are also non-woody, but they are always in leaf; their flower stalks die back each year. Dahlias are “proper” herbaceous perennials but unlike any other perennial we sell, they are frost tender. Bulbs are herbaceous perennials too, but mostly flower in early Spring and have died back by the main perennial flower displays in Summer, Alliums being the late flowering and tall exception. The perennial plant’s cycle repeats annually, and the plant has a life expectancy of never less than three years: typically longer, but even if it’s only 3-5 years, that’s a “short-lived perennial”. Annual or biennial flowers are properly called bedding, but people often lump annuals and perennials together when discussing “soft plants that fill borders in Summer and don’t in Winter”. Using perennial plants in your garden The joy of perennials is their mostly undemanding nature, thriving in any well drained soil with more than half a day of sun. Bit of tidying in Autumn, some feeding and watering in the growing season, and not much weeding because they cover the soil so well. Lovely. A garden designer in the pub once said: “A formal border is mostly shrubs with a few choice perennials and bedding plants. An informal cottage-y border is the opposite: mostly perennials and bedding plants with a few choice shrubs. All shrubs is a car park, and all perennials and bedding plants looks sad about half the year.” The White Hart Arboricultural Institute, Castle Cary. Guest Ales and Karaoke Most perennials are grown for their flowers, some for their foliage, but they are all hard-working plants that fill your borders & patio containers with colour and texture. Most are hardy, some appreciate the protection of hay or mulch to insulate them in winter. They mostly flower from late Spring through Summer, some into Autumn, even until the frosts. attracting all your local bees and butterflies. We grow tried and tested favourites, and new varieties. Our top quality, disease-free plants are grown in pots that are increasingly recyclable, and we use peat-free compost whenever possible.
Read More
Growing Dahlias
September 1st 2025 Blog

Growing Dahlias

This guide is for Dahlias in open soil, read about growing Dahlias in pots instead. The golden rules of dahlia growing are to keep them free from frost, plant them in the sun with support (rings with open centres are better than supports with criss-cross grids), then feed them well, keep them free from pests and either cut the flowers often, or deadhead them early. Do these six things, and your reward will be a constant supply of popping flowers from July till the first frosts. Dahlias are tender Central American plants. A light frost will cut down the plant, which is fine, many growers like to wait for this before cutting back their dahlias, but a hard freeze with no protective mulch can kill the tuber.So, in colder, wetter parts of the UK, it’s a good practice to dig up at least half your Dahlia tubers growing in borders before winter freezes (mulch the rest with something light and dry like leaves or straw).An easier option may be to grow them in nice terracotta pots that you move from flower border into shelter overwinter. How to Dig Up & Store Dahlia Tubers Overwinter How To Start Dahlia Tubers In Spring Plant them out again promptly when the soil warms in April-May so that their roots establish well.This yearly removal and replanting process means that, from a garden designer’s perspective, Dahlias in practice behave like annual bedding plants. Plant in good, thoroughly prepared soil, enriched with well-rotted compost, in a sunny spot with good drainage. Making a low raised bed is a good tactic on heavy clay. Fill it with a mix of compost, leafmould, worm castings and something like coconut coir to retain moisture. Break up the clay a bit underneath the bed, add some grit (not sand) if you want to improve drainage, you don’t need to mix compost down into it. Water Dahlias consistently in dry weather: the bigger the flower, the thirstier the plant. Varieties with small flowers and short stems are more drought resistant than the big showy ones.Feed them with diluted tomato feed from June onwards. Taller varieties need solid stakes, bamboo canes will do for the rest, and it is best to drive these in at planting time. Strong garden twine, wrapped around several times, especially the tall, decorative “dinner plate” dahlias, will secure them nicely. Many low plants can help to cover up dahlia legs, lavender loves the same sunny, well drained conditions. Earwigs are the dahlia grower’s number one enemy. Earwigs also eat huge numbers of greenfly, so we suggest trapping and relocating them. Fill little pots with newspaper, dry grass or straw and put them upside down on bamboo canes amongst your dahlias. Empty the traps wherever you have greenfly, or as a public service, onto roadside Lime trees (Tilia species). For the biggest flowers for the show bench (or just because size always matters), pinch off all buds on a stem except for the main one. Alternatively, for a balance of bigger flowers and filling up your vases around the house, reduce the number of buds on a stem to two, three or four. If your garden display is the most important thing, then leave them be and just deadhead them as soon as they begin to fade. Cutting Dahlia Flowers Cut dahlia flowers for vases in the early morning. Cut horizontally with secateurs right above a set of leaf nodes and side buds. Try to cut flowers when they are 90% open; dahlia buds don’t open much after cutting. When you’ve brought them inside, cut off leaves that’ll be underwater, as for any plant going in a vase. Holding the stems underwater, make a fresh diagonal cut across the bottom of each stem, keeping the ends underwater – a basin is best for this. When you have trimmed a bunch, quickly put them all directly into a vase with about 6 or 7cm of hot, not boiling, water. As long as you move them quickly from water to water, the stems will not take up air into their vascular systems (phloem and xylem), which blocks them.Change their water every day (you guessed it: quickly move them from the old vase to the new vase, or a bucket of water and then back to the vase), and add solutes to it. You can buy solutes ready-made, or make your own florist’s brew: a little squirt of lemon juice, a pinch of sugar (ideally fructose), and one drop of bleach. You’re coaxing the flower into living a little longer with a shot of energy, while preventing bacteria from taking advantage of the situation and clogging up the stem.
Read More
dahlia-classification
September 1st 2025 Blog

What are the Dahlia Flower Shape classifications?

Dahlias are all grown basically the same way, but the flowers vary greatly in size and shape. Some are better than others for the border, for cutting, or for showing off your giant dinnerplate blooms that are so heavy they need staking to hold them up! Involute vs Revolute Petals Involute petals curl inwards, closing into the centre of the flower: Revolute petals curl outwards to the rear of the flower, swept back away from the centre: The craziest looking cactus dahlias have petals doing both: Dahlia Groups Single Flowered: One outer ring of florets, which may or may not overlap, and make up a disc in the middle.Anemone Flowered: One or more outer rings of ray florets (usually flattened) around a mass of tubular florets, with no visible disc in the middle.Collarette: One outer ring of ray florets (usually flattened) that overlap, and an inner ring, or collar, of small florets, with a visible disc in the middle.Waterlily: Wide but shallow, fully double, open blooms with wide ray florets. The depth of the bloom is not more than one third of its diameter.Decorative: Fully double, with no visible disc in the middle. The ray florets are normally wide, and either flat or twisted, and typically have a blunt end.Ball: Fully double, and form either a near-perfect or flattened ball. The ray florets are rounded at the tips.Pompon/Pompom: Fully double & spherical, with florets largely involute along their length (longitudinal axis).Cactus: Fully double, typically with pointy ray florets, most of which are narrow and revolute for over 65% of their length (longitudinal axis) and either straight or involute for the rest.Semi-Cactus: Fully double, typically with pointy ray florets that are revolute for between 25% and 65% of their length, wide at the base, and either straight or involute for the rest.Star (formerly Single Orchid): One outer ring of florets around the disc. All the ray florets are either involute or revolute.Double Orchid: Fully double, no visible disc, with triangular centres. The ray florets are narrow, and all of them are either involute or revolute.Paeony: Several outer rings of ray florets around a central disc. The florets are flat or slightly involute at the base, and the rest is flat slightly revolute. A Bit of Dahlia History Dahlias are named after the 18th century Swedish botanist Ander Dahl, who also has a snake named after him – Dahl’s whip snake, Platyceps najadum dahlii. Dahlia Flower Fact Dahlia petals are edible and make a pretty garnish or salad addition.However, the same is not true of the tuber: the wild varieties were a staple food source for Aztecs, but it seems that cultivation has made them unsuitable for eating.
Read More
climbing-plants-wall-damage
September 1st 2025 Blog

Do climbing plants damage walls?

Gutters, Pipes & Fittings are Always Vulnerable Most climbing plants can damage, block, or push guttering, drainpipes and other external fittings off the wall. Wisteria in particular is the drainpipe & gutter crusher! Twining tendrils generally won’t damage walls Unless their weight gets too much for their supports, these plants are safe for any wall Clematis Grapevine Jasmine and Trachelospermum Climbing Rose Potato Vine Sausage Vine Wisteria is a partial exception: with age, it gets very heavy, with strong vines that can crush things they twine around. Keep it off drainpipes! Zoom in on the wisteria “tree trunk” between the white garage doors. It’s swallowed whatever use to hold it up.You can see how far it extends to the left. It’s partially covered by Parthenocissus to the right, but it wraps around the building. Aerial roots and suckers can damage old, crumbly structures, and paint Ivy Parthenocissus Creeper Hydrangea petiolaris These plants will damage old, crumbling brickwork that already has cracks for them to attack, but should not be a problem for new houses, except the paint job when removing them. Don’t yank them off when they are alive, or they will take the paint with them. Cut the vines at the base to kill them, then leave them for several months to wither and dry out before pulling them off.
Read More
shrubs-ornamental-hedging
September 1st 2025 Blog

What are Shrubs?

A shrub is a woody, freestanding plant that naturally has multiple main stems. Through pruning, many shrubs can be grown as a tree form with a single main trunk, and vice versa, many trees can be pruned & trimmed into a shrubby form, which is how hedges are made. Rose bushes are natural shrubs that can be grafted as a tree stem lollipop rose, and even low shrubs with thin, weak wood like lavender can be pruned as little “trees”, we don’t sell those, you see them at the front in Morrisons and Lidl. Both of these unnatural shrub-into-tree shapes need a stake for support. If a plant does not have woody stems and dies back in winter, then it’s either a herbaceous perennial if it lives for over 3 years, or an annual / biennial plant that dies after flowering. What’s the Difference Between Ornamental and Hedging Shrubs? In the plant selling industry, it’s common to refer to cultivated ornamental shrubs and their wild species hedging shrub versions. For example, you can buy cultivated Viburnum ‘Dawn‘, and wild Viburnum opulus, Guelder Rose. They are typically, but not necessarily, used for different garden design roles, Ornamental shrubs look great sculpted in borders, often singly or in threes for a natural look, or rows and squares for formal gardens. Wild species hedging is planted in bulk, close together at 3+ plants per metre, so the overall effect is impressive, and they form a security barrier. Price wise, Hedging plants are cheapest. Field grown at a larger scale from seed, often available bareroot in Winter for the best value. Ornamental shrubs are grown from cuttings in pots on a nursery, which is much more expensive than a field! But the choice is yours! You are free to make a hedge with luxurious, named shrub cultivars like Berberis ‘Chocolate Summer’, and then grow a wild species like Berberis darwinii as a clipped border shrub. Dogwood is a common hedge plant as a wild species: Cornus sanguinea for a native hedge, Cornus alba otherwise, which we only deliver bareroot in Winter. But Dogwood’s ornamental forms like Midwinter Fire, Spaethii, or Elegantissima are usually hard pruned to a low stool each year. They’re so popular that they’re sold both bareroot in Winter, and potted year round. While you could have a dogwood hedge of Cornus Elegantissima, or hard prune wild Cornus alba in your border, there are some reasons why you might not: The hard pruning regimes that bring out some ornamental shrubs’ best features are not suitable for a secure or tidy hedge. Some ornamental shrubs shine as specimens with space to spread, which is lost when clipped as a true hedge. We don’t sell it, but Pagoda Dogwood, the Wedding Cake Tree, is an example. Some wild shrubs have “bad habits” in a border, perhaps root suckers or seeds.
Read More
Nik Mitchell's Problem With Pollarding
September 1st 2025 Blog

Nik Mitchell's Problem With Pollarding

Following on from David Cracknell’s observation that “Britain’s love of trees is real, but it needs to grow up”, we have the story of Nik Mitchell’s response to the routine pollarding of some local poplar trees near Sandwich in Kent. Image credit kentonline.co.uk & Get Wild, thoughts my own Yes, that is a harsh cut to make in Spring, early Winter is best for a drastic prune because it gives the tree time to react before growth starts. But trees are like, literally super tough, so it’s not a dealbreaker. Pollarding is a traditional method of renewable tree management, the same as coppicing except for the short trunk. Pollarding: Looks pretty Supplies wood for fuel, baskets, and fodder known as tree hay Is a convenient height for pruning, deer & livestock can’t reach the leaves Prolongs the tree’s life Has to be maintained These are willows two years after pollarding, not poplars, but the principle is exactly the same.By Charles01 – Own work, CC BY-SA 3.0 Given that Nik’s current header image on his Get Wild facebook page is him standing in a bluebell covered old copse, it’s remarkable that he doesn’t know this. The pollarded poplars in question were overhanging a road where a dropped branch could be fatal to drivers, and poplars have relatively weak wood that’s prone to snapping. Below are some unpruned old poplars nearby, with dead wood and splits gaping down to the base, and multiple trunks pulling in different directions. As a great arborist once said, they are “punky, crispy, ready to squish thee”. They aren’t safe in their untamed state, and they line this road for a good stretch. Below are the remnants of ancient pollarding cuts, fallen into disrepair; it’s possible some were snaps rather than cuts. These two are death traps, with mature single tree trunks growing from below the pollard point, waiting to tear the base trunk in half and land bang on the road. Just add wind. Poplars regrow like billy-o from a pollarding cut, and are clonal trees that shoot from the base, effectively making them impossible to kill by felling, but dour biology is not useful to Nik’s feelings case. Yes, the old poplars are a fine skyline feature, pollarding them changes the feel of the roundabout a lot. “It feels like a significant loss for the environment” No trees were removed, only pruned – ed You might say I am picking on Nik unfairly. But I am picking on him fairly and squarely. Nik went to a lot of effort to promote his environmental activism and his feelings-based tree pruning ideas. Nik’s basic contention is that pollarding these poplars is “decimation of the countryside for little gain”. I leave it in your gentle hands, Dear Reader, to decide what you think of the idea that ancient, sustainable tree management practices are “decimation of the countryside”, and that keeping you and other drivers safe from trees and branches falling on the road is “little gain”. Let’s imagine a worst case scenario: the poplars were pollarded too hard, too late, and they all died in a scorching Summer drought, possibly a Kentish wildfire scenario. The row of dead trees would make an ideal spot for a mixed native hedge, perhaps studded with standard trees like birch and rowan, which will support much more wildlife than a single species row of poplar trees. Do you think this is meaningful environmental activism, or a tiresome waste of everyone’s time? To be clear: I like Nik, he cares about nature on our island to the point of radical conclusions about road safety, which is a great thing when it’s done right.
Read More
Pruned lavender
September 1st 2025 Blog

Harvesting Lavender Flowers

All the lavender plants we sell have flowers suitable for drying or oil extraction, great for aromatherapy, chandlery and baking. When should I harvest Lavender for its oil? Lavender flowers contain the most oil immediately after their full bloom, when the very first florets begin to wither, but most are still looking lovely. Which Lavender is best for oil? Browse the three best varieties for oil. Dutch lavender produces more oil and has a bolder fragrance, so it is mainly used for scenting rooms and cabinets, in potpourri or candles. English lavender is the best suited to cooking and aromatherapy or soap. When should I harvest Lavender for dried flowers? Harvest Lavender for drying earlier than for oil, when about half the buds on a flower head are still closed. They should stay in one piece after drying and being knocked around. To dry bundles of lavender flowers on the stalk, hang them upside down somewhere dark and well ventilated, with something underneath them to catch any heads that fall off.
Read More
English, dutch and french lavender compared
September 1st 2025 Blog

Differences between English, Dutch, and French Butterfly Lavenders

Table of Contents Differences & Similarities Lavandula angustifolia: Common or English Lavender Lavandula x intermedia: Dutch Lavender or Lavandin Lavandula stoechas & L. pedunculata: French / Spanish “Butterfly Ears” Lavender Which Lavender is Best as a Herb for Kitchen Use? Differences & Similarities The groups of Lavender plants commonly grown in UK gardens are English Lavender, Dutch Lavandin, and French “Butterfly” Lavender. They all: Can be clipped into low ornamental hedges, ideal for edging the base of borders and planting around the feet of taller shrubs like roses. Are Mediterranean coastal plants that thrive in a poor, free draining soil with full sun and good air flow. Are good to grow in pots on patios etc. Are great for bees Lavandula angustifolia: Common or English Lavender Fully Hardy: RHS Rating H5 (-15 to -10) Best species for cooking and aromatherapy with a sweeter, more soothing scent, ideal for pillows and evening baths Thin cigar shaped flowers with no ears Most popular group for growing in the UK Includes the two all-time best-selling varieties, Hidcote and Munstead It’s not native, it just grows well here Lavandula x intermedia: Dutch Lavender or Lavandin Fully Hardy: RHS Rating H5 (-15 to -10) Best species for pot-pourri, candles, and insect repellents due to its stronger, more stimulating camphor-rich fragrance, ideal for sock drawers and morning shower gels! Longer, tapering flowers ending in a point, usually with one or two smaller secondary flower heads further down the stalk. Lavandula stoechas & L. pedunculata: French / Spanish “Butterfly Ears” Lavender Hardy in most of UK: RHS Rating H4 (-10 to -5) Ideal for pots that can be moved to shelter during Winter in colder regions of the North & Scotland, mostly to prevent cosmetic damage to the leaves Best looking flowers and blooms before others Distinctive “butterfly ears” called bracts on top of their chubby, cigar shaped flowerheads. Which Lavender is Best as a Herb for Kitchen Use? All lavender is edible, but only English lavender, is low enough in bitter camphor to taste good. Rich purple flowering varieties, like Hidcote, Havana, or Beezee Blue, are best because they keep their colour when dried and cooked Paler purple, pink or white varieties like Munstead, Arctic Snow, Loddon Pink, or Rosea tend to go a bit grey when dry
Read More
oak-english-quercus-robur
September 1st 2025 Blog

David Cracknell Starts British Woodland Substack

David Cracknell, renowned piano player and former Sunday Times political editor, has started a substack, Stump Speech @djcracknell, kicking off with a piece musing on the mostly felled Toby Carvery Oak, a 500+ year old Common Oak in North London, and the implications of people’s reactions. His debut post rightly points out the difference between a natural or a well-managed forest, and a Sitka Spruce forestry plantation where you’d be lucky to see a bird or animal. He is on the money when he says that the best forests for wildlife are managed by humans with a cycle of coppicing, pruning, felling, and mixed species replanting. This skilful human activity prevents the formation of a solid canopy that shades out the forest floor, allowing many more species to thrive, and prolongs the life of the grand old trees that aren’t being felled. But his post also begs a big question. David states: “There is a failure – not just among the public, but policymakers, commentators, and even some arborists – to grasp a few basic facts about how trees live, die, and regenerate. Until we address this, our woodland policy will continue to falter, no matter how many trees we plant.” Which is fair enough, to an extent. Many years ago, I was coppicing some neglected hazels in Kent, when someone driving past got to the end of the road, turned around, parked nearby, got out and began shouting at us for “destroying trees”. Naturally, I explained that these were invasive Canadian killer hazels, and I was on a mission from John Major to save England; that was the end of the matter. However, one could reasonably reply to David, “is lack of knowledge among policymakers actually the reason for the state of Britain’s forests? Surely it is plausible that the people in charge are fully aware of how trees live, die, and regenerate, but operate according to other concerns, such as making money and keeping their boss happy.” A cynical person might go one further: does David’s case really go against these policymakers, or is it making rather poor excuses for them, pleading ignorance on their behalf about their own careers? I don’t know, but it’s pretty central to his argument. If the problems with managing Britain’s forests are not the result of poor education among policymakers, then all the education in the world won’t fix a woodland sausage. David indicates this when he says, “Despite the rhetoric, British forestry policy still leans heavily toward plantation silviculture and imported conifers. Natural regeneration – our woods’ own way of healing – gets scant support. Vague terms like “multi-purpose forestry” and “low-impact silviculture” pepper strategy papers, but this rhetoric lacks the practical guidance foresters need.” I leave it in your hands to decide whether it’s physically possible to be both woefully uneducated on doing the right thing with forests, and to produce clever rhetoric for public consumption that creates the illusion of doing the right thing while really doing the profitable thing. David’s post ends on a note that sounds like it’s pointing a finger at you and me, Dear Reader, rather than the policymakers and industry leaders who run the show. “Britain’s love of trees is real, but it needs to grow up. We need an ecological maturity that sees a felled tree not just as loss, but as renewal.” What do you mean ‘we,’ Kemosabe? The “ecological maturity” of the average person has nothing to do with Britain’s forestry policy. We have no say over any forests, unless we own one. And that is the note I want to end on. We deliver plants to thousand of people, many of whom are thinking, and planting, along these lines: 
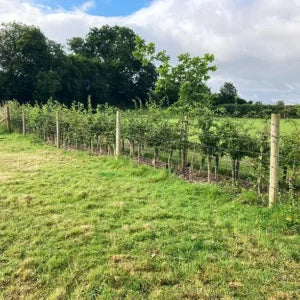
Where there is room for a hedge, there is room for a slice of forest: native hedges are perfect, but any mixed species hedge is better for nature than a single species. In most fields there are a few square metres in the worst corner that could be spared for a mini forest, perhaps inspired by Miyawaki Method high density planting, or one huge weeping willow whomping in that boggy spot at the bottom. 
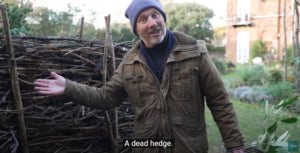
Forest owners want to enhance the usefulness, beauty, and financial value of the woods, as well as its wildlife capacity. Felling trees creates essential dead wood habitat on the ground for beetles, firewood or timber, and opens space to plant ten times more trees. 
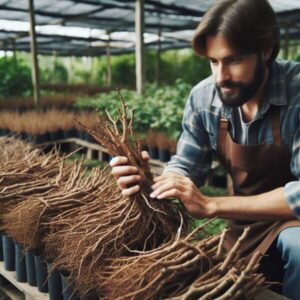
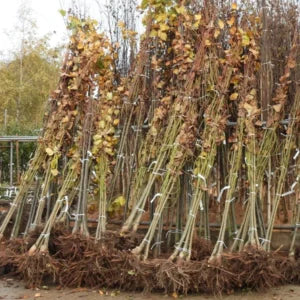
When planting any forest, you will use bareroot tree “whips”, meaning young, usually unbranched trees under 1 metre tall, or small, cell grown conifers that have a plug of soil on their roots. The bareroot planting season is in Winter, roughly November-March. You can order bareroot sapling trees suitable for any forestry project (or hedge – it’s almost the same thing, just bushier), for the 2025/26 Winter planting season now, and pay nothing until right before they are delivered.
Read More
hide-fence-with-plants
Best
September 1st 2025 Blog

Best Plants For Growing Over & Covering Fences

Table of Contents Climbing Plants Hide A Lot of Fence for a Small Footprint Best Climbing Plants for Covering a FenceDoes Ivy Destroy Wooden Fences? Best Wall Shrubs for Covering a Fence I Can’t Use Plants: How to Hide My Fence Without Them? Painting or Staining a Fence Black Covering an Ugly Fence with a Nice Fence! Horizontal Roofing Slats Faux greenery panels Climbing Plants Hide A Lot of Fence for a Small Footprint In many cosy gardens, the vertical surface area of fence is larger than the soil surface! Putting a hedge in front of a fence has the advantage of keeping the fence itself free for maintenance, and there is no risk of plants getting too heavy and shortening its lifespan. But in a smaller garden, that means sacrificing too much floor space. Your main options for covering a fence with plants are climbers and “wall shrubs”. Best Climbing Plants for Covering a Fence When covering a fence, most people want evergreen plants that are reasonably quick growers. Trachelospermum jasminoides, commonly known as Star Jasmine. Does very well on North facing fences under open sky. Trachelospermum asiaticum, Asiatic Jasmine. Most people consider it slightly less attractive than Star Jasmine due to its smaller flowers, but it’s the better choice for the coldest inland Northern & Scottish regions “Evergreen” honeysuckle varieties. Honeysuckle is famous for its flowers, but Mint Crisp also has lovely mottled leaves to maintain interest almost year round; depending on your region, evergreen honeysuckles may be semi-evergreen, meaning they have leaves for most of the year. Clematis armandii, with its large, lush leaves, is the best evergreen clematis for hiding things. Other evergreen clematis species like Clematis cirrhosa ‘Jingle Bells’ will also work: the leaves aren’t as lovely, but they do flower in Winter. Does Ivy Destroy Wooden Fences? Despite it being a great choice for hiding brick and metal, most people choose not to grow Ivy on a wooden fence due to its structurally invasive growth habit. But the argument against growing ivy on wooden fences is not as simple as ivy causing damage. Ivy tends to have an “overall preserving” effect on wooden fences: fusing with them, growing a fairly sturdy cage of woody vines through and over them. The evergreen leaves protect from the elements, and the strong vines support the parts of the fence at the same time as pushing in between them. As long as the ivy is healthy and trimmed a bit to reduce top-heavy weight and to allow light down to the base, this living arrangement will outlast fence panels without ivy. The problem comes when the ivy is cut back to the base or killed, and the whole thing collapses. Best Wall Shrubs for Covering a Fence These woody shrubs or small trees have good ornamental value, and respond well to being trained on wires up against a vertical surface in much the same way as a climber. Pyracantha – needs to be pruned into “storeys” tied flat along wires as an espalier to get the full flowering and then bright berries effect, which is simply one of the best. Here’s an unpruned specimen, still looks great: Cotoneasters – The most famous is Rockspray Cotoneaster, staple of urban plantings, but if you have support wires then you may as well use the superior franchetii or simsonii in your garden. Mimosa, Acacia dealbata – ideal for making the most out of a hot South facing fence, prune after the last frost to keep it in bounds. I Can’t Use Plants: How to Hide My Fence Without Them? If you can’t use plants to beautify your fence, that leaves either painting / staining it, or fixing a covering onto it. Painting or Staining a Fence Black Cheap and easy to DIY. Filmmaker Mark Spencer has the world’s best video introduction to staining a fence black, which gives a dark charcoal grey finish. This dark, natural colour of burnt wood is a winner that works with pretty much any planting scheme because it goes so well with most plants: both green leaves, and really any of the common ornamental bark colours, from grey to orange-red. Mark left his concrete posts unpainted, which looks great contrasted with the black; from the corner of your eye, they are like tree trunks. Mark speaks so clearly you can play his videos on 1.5x speed Covering an Ugly Fence with a Nice Fence! Cladding the existing fence with nicer material is more expensive, and more transformative! Horizontal Roofing Slats Simply, effective, a tidy modern look at a DIY level most people can manage: Or an even smarter professional job with a hip light strip on top: Faux greenery panels If you like plastic plants, we are not here to judge your taste: you’ve heard it all before. It’s great for renters, who can put it up for their lease, then take it down and move it to their next home. Plastic leaves aren’t meant to be inspected and admired like a crisp hosta, they are for a green “natural texture” backdrop as you focus on your favourite meal, book, or person. Green is scientifically soothing, and we all know how nice a sooth is.
Read More
lavender-plants-uk
September 1st 2025 Blog

Is Lavender Native to the UK?

No, Lavender is not native to the UK, it’s a Mediterranean plant. The Romans introduced lavenders to Britain over 1,500 years ago, using the flowers to scent and wash themselves; the word itself is from the Latin lavare, to wash. Their legionaries carried dried lavender to pack into bandages for its antibacterial properties, and it was as staple of nosegays from then until whenever people stopped gaying noses. Since those times, the species that performed the best here is so-called English Lavender, Lavandula angustifolia.Read about English Lavender compared to Dutch Lavandin and French Butterfly Ears, which are also widely grown in the UK today. English Lavender History Trivia By the 17th century, many houses had rooms where essences were distilled for household use. One of the traditional apothecary’s key ingredients, a row of Lavender was a must for a proper herb patch. Queen Victoria was a lover of lavender scented items, ordering it in everything from wood polish to bath water and laundry soap. Such products were fashionable with the ladies of the day, and the English lavender industry took over miles of farmland. It takes 100-130 kilos of flowers to produce one kilo of lavender essence. The main growing areas were around Merton in South London, which was Surrey in those days. At the height of its popularity in the Victorian era, Hitchin growers Perks and Llewellyn were cultivating over 100 acres of lavender.The rise in land prices after the First World War pushed growers out of business, and today most commercial lavender is grown in Provence, where the vast expanses of purple and blue, contrasted with sunflowers and wheat in peak season, against a backdrop of lakes, historical villages and churches are an iconic image and huge tourist attraction. Essential lavender oil from the Haute-Provence region (the best-known region is the Valensole Plateau) is a certified product with AOP status, and 10ml of essential lavender oil sells for around £6 in the UK.These days, lavender is more popular than ever in a wide range of edible products, from teas to honey, chutney, ice-cream, chocolate and fudge, and British lavender fields are making a comeback, mainly in Kent, the Cotswolds and Norfolk. A quick remedy for bee stings is to use a paste of baking soda and water to neutralise the sting, letting it dry for a few minutes, then applying a drop of lavender oil to soothe and disinfect the wound. It is a salve for stress and insomnia, and soothes post-surgery pain. Its clean, refreshing scent, when dried and stuffed into linen pillows, is greatly enhanced with eucalyptus prunings: hung strategically in the shower cubicle, they will lend a spa-like scent and relaxation to your ablutions (whale music optional). Lavandula angustifolia, meaning ‘narrow leaf’, is known as “English lavender”, and was formerly classified as Lavandula officinalis, which refers to its belonging to a storeroom as a medicinal plant. That name is common among medicinal and useful herbs like Salvia, Pulmonaria, Rosmarinus, Borago, and Hyssopus officinalis.
Read More
armandii-clematis
Clematis
Planting
September 1st 2025 Blog

How Deep Do I Plant a Clematis?

Table of Contents Why Plant Clematis Deep in the First Place?Does this apply to every Clematis group? Never Plant a Clematis Shallow Most people plant their Clematis vines a little deep, the British Clematis Society says: “Ensure that the surface of the root ball is at least 3″ / 7.5cm below the level of the surrounding soil.” In our clematis growing guide, we add that even up to 6″ / 15cm below soil level is good for larger plants, more specifically: Clematis in 2 – 3 Litre pots: The crown of the plant (where the stem/s emerge from the compost in which it was grown) should be at least 3-4″ / 8-10cm below soil level; a larger specimen with a really strong, woody stem can go about 6″ / 15cm deep. Clematis in 9cm pots: First, read our post on P9 pots: we usually recommend growing them on in larger pots first. Place these younger plants at least 3-4″ / 8-10cm deep in the hole, but do not return the soil all the way up over the stem until it has become woodier, which is usually the winter following planting. Then cover it up so that at least one stem node is buried. And here is the reason for that: Why Plant Clematis Deep in the First Place? The reason is to bury at least one node on a woody, “ripe” stem, soft new growth less than a year old doesn’t count. Bury a woody node Underground, the buds on that mature node will root and make multiple new shoots. This gives the plant a stronger foundation of roots that can support a fuller plant above ground faster The extra vines allow susceptible Clematis groups to outgrow Clematis Wilt Disease, and the crown itself is protected underground Does this apply to every Clematis group? No, the small-flowered Clematis groups Atragene, Montana, and Tangutica, and all non-vining, perennial “bush” varieties, are fine to plant at soil level*, according to Ken Black and clematis.com.pl, Poland being one of the leading Clematis breeding nations. According to the RHS, “Several of the large-flowered hybrid cultivars are very susceptible , but the smaller flowered species appear to be much more resistant.” But in practice, people do plant these wilt resistant clematis groups deep all the time, so it’s clearly not a problem for them, even if there is no benefit, at least for disease prevention. Never Plant a Clematis Shallow Avoid planting clematis high like the valiant specimens pictured below: they survived, plants are generally tough, but for sure they struggled a lot more than necessary. From this Garden Fundamentals video by our Canadian mate Robert Pavlis *As clematis.com.pl notes, which applies to every potted plant, “planting at soil level” ideally means that your hole is 1cm deeper, so you can sweep a thin layer of the new, native soil over the top of the rootball. This protects the top of the potting soil from drying sun and wind; especially important on clay rich soils, and if mulch won’t be used.
Read More
thatchers-cider
Apple
Cider
September 1st 2025 Blog

Backseat Driving Thatcher's Cider Biodiversity

Table of Contents Let’s begin the backseat demolition driving: Havens for biodiversity claim, part 1 Havens for biodiversity claim, part 2 Bees claim Worms claim I’m done with the press release, time for a Thatchers I saw this article in HortWeek: Thatchers Cider plants 13,000 apple trees in new Somerset orchard. I made a mental wager to myself before reading it: I bet they exaggerate the environmental benefit side of the orchard. Not because of anything about Thatchers Cider. It’s because I think it’s nigh impossible to write a press release about rural industry without flexing, or stretching, the old environment creds. Especially with our robot chums Chat GPT et al behind the pen. Let’s begin the backseat demolition driving: “The planting follows three years of regenerative farming to prepare the land for the new trees, ensuring top quality soil for the tastiest apples.” Stop. Regenerative farming is by definition not intended to be a three-year process. It is a holistic, longer-than-life approach to agriculture. Sure, you could apply some of the principles during a brief phase like this, and benefit the soil life greatly.Because no specifics are given, I’m reading three years of “regenerative farming” as “growing a fallow meadow of cover crops, possibly with livestock grazing, at least some horses”. Which is lovely, but slightly oversold. So, let’s grant them those three years: one could equally well say “the planting ended a mere three years of regenerative farming”. “Our orchards are not only places of cider production, but havens for biodiversity; from the bees that pollinate the trees to the worms that enrich the soil.” Martin Thatcher, Quoted in a Press Release for Hortweek I’ve never spoken to Martin, and I’ve seen how press releases work, so I am not assuming that Martin, or any human, actually said that. Let’s gut the absurd statement until there are only giblets left for our stew, seasoned with bay tree leaves from yesterday’s laurel crowns. Havens for biodiversity claim, part 1 The best orchards for biodiversity are known as polycultures, mixed orchards that grow several fruit tree species, often with smaller shrubs and perennial crops in between them, ideally sprinkled with support trees grown for their soil building and wildlife value. Stefan Sobkowiek is Canadian level handsome and charming, and happens to know a bit about polyculture orchards. Thatchers are growing 13,000 apple trees, half Red Windsor, half Katy. These versatile, reliable varieties are typically eating apples to a home grower; neither is a dedicated cider apple such as the Redstreak, Dabinett and Tremlett’s Bitter in a delicious Thatchers Big Apple. A field of only one species, albeit in two varieties, is the opposite of a biodiverse realm: it is the definition of a monoculture. Havens for biodiversity claim, part 2 Most country fields have a potentially biodiverse hedge around them, and in the HortWeek article, you can see there’s a hedge running through the field too. On the one hand, top marks for them not simply removing the hedge: credit where it’s due, bravo. On the other hand, after 3 years of regenerative farming, observe the gappy state of it: I can’t see a 2-3 metre margin of meadow along the hedge, which would greatly increase its wildlife capacity. The track runs along the hedge, and there are fruit trees right down to the track, squeezing nature out for profit: that is how most farms work to have any chance of making money. Even with poor resolution, you see the hedge has not been laid in an age, and not beefed up with a spot of replanting and some hedgerow trees. All of which are top of the list for biodiversity improvements in this orchard. There isn’t a lot else to do biodiversity-wise without redesigning the whole farm. Bees claim Hive pics, or it didn’t happen.All the points above count against ze beez too: a monoculture orchard offers a short feeding season, and the poorly maintained hedges have no meadow margin around them, nor any hedgerow trees to increase the wild bee habitat and forage. Worms claim They surveyed the worms, the worms said they were happy, and await our company in the cool earth. Sobering. In fairness, mulching an orchard this size with manure and/or woodchips might not be practical. But that’s what it would take to seriously feed soil life in a field with no animals, and no natural build up of fallen plant matter on the ground. Most large orchards do not mulch, in which case those strips of bare soil under the trees are bad for soil life, and the strips of increasingly compacted grass (maybe they aerate it) between them are merely OK. Some farmers spray the ground with watery manure, which can form a lovely water-absorbent “blanket” for several months, great for soil life. I’m done with the press release, time for a Thatchers Thatchers is a great company, they have a community orchard project, they make cider, they are good for the rural economy, and I see this same biodiverse credentials stuff in press releases everywhere, as though they were legally required to come up something, anything, even the worms. I’ll toast you for the road now with a Thatchers Rascal because it tastes nice, a bit sweet but not cloying. That’s how I judge beverages, press releases don’t come into it. I can’t drink Thatchers! Look at this oversold biodiversity statement in HortWeek! Worms, for crying out loud!
Read More
P9 size pot
Planting
September 1st 2025 Blog

How Big is a P9 Pot & What No One Tells You!

Table of Contents A P9 pot is 9cm wide at the top, containing about half a litre of soil What Almost No One Tells You About P9 Plants!The P9 plant is usually a cutting that only has about a year’s root development For Best Results Planting P9 Pots: Pot them Up!Lavender P9s Are Good to Plant Out In Spring How to repot P9 plants quickly OK Thanks, But When is the Best Time to Plant out Plants in P9 Pots? Key Takeaways A Word From Ken Black on Clematis in P9 PotsAre p9 pots worth it? A P9 pot is 9cm wide at the top, containing about half a litre of soil It would be clearer if P9s were called “half litre pots”, but the industry standard is to measure pots under 1 litre by their width in centimetres, rather than their volume in litres. P9 is the smallest pot size you would typically buy any woody or perennial plant in, and the largest size you might buy an annual / biennial plant in. Like most highly reputable suppliers, we deliver annual Cosmos and Sweet Peas seedlings in Jumbo Plugs, which are the best value for that type of plant. What Almost No One Tells You About P9 Plants! Experienced gardeners know that plants in P9 pots are great value if you are happy to wait one year before planting them outside in most cases. Why? The P9 plant is usually a cutting that only has about a year’s root development It’s still recovering from the trauma of being cut from its original roots, and forced to grow new roots out of its leaf buds! It’s not fully ready for the big bad world of soil life and weather out in your garden. The best thing to do with a plant in a P9 pot is usually to pot it up into a 1-3 litre pot, and nurture it in a sheltered place for a growing season, or at least overwinter (evergreen plants in greenhouses should grow roots through the Winter), to beef up its root system before planting it out into the open soil. To be clear: people successfully plant millions of P9 size plants out directly into the soil, and it works out fine. Potting up P9s for a season before planting them out is about preventing failures, and giving your little plants the best possible start. Planting P9s into patio containers of fresh compost obviously counts as potting them up. P9 plants grown from seed have a non-traumatised root system, so can often be planted out with decent results when their roots fill the P9 pot; the same is generally true of plants grown from rooted cuttings, as many herbaceous perennials are. An experienced gardener who knows the plants and their location will decide for themselves whether these guidelines apply. For Best Results Planting P9 Pots: Pot them Up! If you bought two of the same plant in P9 pots, you would have a bigger, stronger plant with better roots after a year on the one you potted up, compared to the one you planted out directly to garden topsoil. Potting up tends to be most beneficial for skinny plants like climbing vines; a little clematis P9 has less wood than a pencil! At the other end of the sensitivity scale, tough, scrubby shrubs like Lavender or Berberis do well as P9s planted into warm soil in May or June. Lavender P9s Are Good to Plant Out In Spring Lavender turns out to be one of those plants that performs well as a P9 planted out directly into warm soil in mid/late Spring.Part of the reason is young Lavender should be trimmed to maintain low, bushy growth, which also reduces pressure on the establishing roots. How to repot P9 plants quickly It’s easier to pot a P9 plant up into a 2 or 3 litre pot, that’s what I do at home, but a 1 litre pot is adequate. I prefer using a bigger pot and not filling it, rather than filling a smaller pot, unless I am short on growing space. Add some soil: Put some soil in the bottom of the new pot, enough so that you are still able to smush the old P9 pot down into it until its rim is at least an inch lower than the rim of the new pot Fill the sides with soil: Hold the P9 pot in place and tip potting soil all around it to fill in the sides. Excess soil lands in the P9 pot for easy removal, rather than going all over your plant as it would normally, and the plants leaves aren’t blocking the way Put the plant in the hole: Put the old P9 pot as the form to make a perfect sized cavity in the soil in the new pot. It may help if the new soil is damp. Rootgrow is recommended Top it up: Add a little more potting soil to fill in the tops of the sides, and so that all the old soil is covered with new Water it in OK Thanks, But When is the Best Time to Plant out Plants in P9 Pots? Spring is by far the “least risky” seasons for planting P9s out directly into the soil. Late Summer / Early Autumn is usually also OK: Spring: After the last frost, when the soil has warmed to over 7-8C, is the safest time to plant P9s out directly. They have time to establish before Summer heat, and even more time before Winter. Tip: Consistent watering and weeding is essential, mulch is always beneficial Summer: A mid-Summer heatwave is stressful on a new, small plant, especially if the top layer of soil dries out. Tip: Shade cloth may be necessary for the hottest weeks, in addition to the watering, weeding, and mulch Late Summer / Early Autumn: After the last heat wave of Summer, plants have time to establish some roots before Winter Late Autumn / Winter: The most likely time for failures. The roots sit in cold, wet soil for months with little to no ability to develop and adapt to its tougher surroundings. Plants that survive until Spring will be well behind plants that were potted up and kept in a sheltered place overwinter, and produce weaker growth that first growing season due to their smaller roots. Tip: Protect from cold with a decent layer of mulch on the soil, and possibly fleece, straw, or bracken over the plant Key Takeaways Potting up P9s for a year increases survival rates, protecting these recent cuttings from weather and pests as they develop a new root system. Although people successfully plant P9s directly into the garden, especially in Spring, new gardeners are advised to play it safe and pot them up. P9 plants are cheap, and with a little extra work and attention at the start, they quickly develop into robust, full-sized specimens, indistinguishable within a few years from the same variety bought as larger sizes. A Word From Ken Black on Clematis in P9 Pots Here Ken Black of British Clematis Society fame shows the difference in root development between a P9 size Clematis he bought at a supermarket and a 2-3 Litre size plant. We’ve skipped to the part where he compares the roots and talks about planting out P9s: Ken speaks so well that you can play his videos on 1.5x speed Plants differ in how strongly they strike new roots as a cutting, and Clematis is on the more sensitive side. Other plants, like Lavender, have good survival rates when planted out as P9s and so they typically are, but all P9 plants love being potted up and looked after before their final placement. Are p9 pots worth it? P9 pots are good value if you are in no hurry, and when planting conditions are ideal for planting them out directly. For most garden scale projects, people prefer larger pot sizes to save a year or two of waiting around.
Read More
lawn-spring
Lawn
September 1st 2025 Blog

Monty Don Gives the Green Light for Aerating Lawns

This episode of totally healthy and appropriate fawning over Monty Don is brought to you by the phrase “Monty Don shares”. Disappointed as we were to discover that Monty is not called Mo’ Dough, nor Monty Donty, or even just George at home, and underwhelming as the “news” that hazel trees live for over 34 years may be, we were ecstatic to read that it’s mont-fficially time to aerate your lawn. Monty shares the kind of lawn maintenance wisdom that demonstrates why he is a world famous garden show presenter: “The answer is to work on at least once a year by sticking a fork in the ground and repeating the process every six inches or so.” Mon Dontagu, Britain’s Handsomest Gardener The Don has spoken. For more detail on the task, Garden Lawncare Guy covers the basics of using a fork, an aerator tool, or a typical home garden aerator machine. We’ve skipped the intro for you:
Read More
isaac-newton-apple-tree
Apple
September 1st 2025 Blog

Why We Don't Sell Isaac Newton's Apple Tree

It’s not a very good apple tree. Simple as that. Several years ago, we sold “Isaac Newton’s apple tree”, which is already a part-fib. There is no variety named after Isaac Newton (1643-1727), it’s just a regular old Flower of Kent apple Because Flower of Kent is not a very good apple, some enterprising suppliers who shall remain nameless sold similar looking, but much superior varieties like Arthur Turner as the Isaac Newton tree There is no way to be certain that the original tree is in fact the tree of Newton fame: there are several contenders, and they can’t all be The One Officially, the tree at Woolsthorpe Manor is the most direct descendant of the original, but The King’s School, Grantham claims that they have it Either way, it doesn’t really matter: the original tree blew down in 1820, and all the proposed “originals” are regrowth from its roots Flower of Kent is a good example of why many old heritage varieties are no longer grown. They were the best available in their day, but now they are outclassed in every way by newer varieties. Despite being a vigorous tree, Flower of Kent is a poor cropper, a tip bearer, and not self fertile. All of that would be forgivable if it had great fruit, but it doesn’t. Compared to the nation’s most popular cooking apple, the world-famous Bramley, Flower of Kent is, completely unlike you and me, Dear Reader, worthless beyond its historical interest. If you still want to buy an Isaac Newton apple tree, our friends at Habitat Aid sell them. Habitat Aid appeared in a whole episode of Ashridge Backseat Planting, so they are a household name at this point. We haven’t checked to see if they have the real Flower of Kent apple or an imposter: if you buy one, and it makes good crops of delicious fruit, you’ll know you were tricked!
Read More
polytunnel-garden
September 1st 2025 Blog

3 Steps to Set Up an Amazon grade Polytunnel like a Pro

Polytunnels are amazing if they are yours, somewhat unattractive if they are your neighbour’s (a hedge in between might help), and most gardens have space for a wee one. But if you get a regular old polytunnel from Amazon and set it up like the vanilla instructions say, then I am here to tell you could do much better, and I am telling you now before it’s too late. This video by plantfriends.online conveniently shows the three critical things that we would add ourselves if we were constructing a small home polytunnel, I know the list says 4, that’s fine: Base frame adds stability, a little height, and helps with levelling Door frames at both ends make the frame solid, preventing wobble in high winds If the frame comes with the option of cheap cover, which they usually do on Amazon, don’t buy it. Buy a good quality, UV resistant cover separately, slightly bigger than you think you’ll need Wrap the tunnel frame on a warm sunny day, when the polythene sheet will stretch. When it cools, it will tighten. When you reinforce a tunnel this way, you can even build a solid one from wibbly wobbly materials like this DIY project involving water pipe:
Read More
laurel-yellow-leaves
Laurel
September 1st 2025 Blog

Why Are My Cherry Laurel Leaves Turning Yellow?

It is true that Cherry Laurel, Prunus laurocerasus, is a trooper and will grow almost anywhere, but that is not the same as looking tip top as a hedge in all situations. A few yellow leaves here and there are natural, especially in the early years after transplanting when it’s still catching up on root growth. But rashes of them on an established plant indicate your laurel is not happy about something. Yellow leaves may or may not be associated with Laurel shot hole. Phill at Yew Cottage in Ireland, of Garden of the Year 2022 fame, puts it well: There are two common reasons why Cherry Laurel, known for its lush green foliage, can suffer from yellowing leaves. Poor drainage and compacted soil Iron deficiency due to chalky / alkaline soil Poor Drainage and Compacted Soil These two frequently overlap, but not always: compacted soil can be dry, and uncompacted soil can be waterlogged. It’s all bad for roots. Waterlogging: Poor drainage leads to stagnant water in the soil with no oxygen, creating the ideal conditions for root rot organisms (especially fungus-like Phytopthera) to attack your plants. This is fatal for most plants if it isn’t corrected, but Cherry Laurel is so tough that it tends to soldier on with lots of yellow leaves and reduced vigour. Compacted Soil: Heavily compacted soil is airless, lifeless, and has the nasty combo of draining very poorly when wet, but then resisting water coming in when it dries out!Both states are terrible for roots. Iron Deficiency Due to Chalky Soil Alkaline Soil Conditions: It’s all about the Iron Uptake Cherry laurels prefer slightly acidic to neutral soils. They usually also grow well in alkaline, chalky soil, if it is reasonably rich in organic matter and well mulched. But there’s a risk of iron deficiency in poorly fertile alkaline soil. So, the problem is not alkaline soil itself, the problem is the iron deficiency it tends to cause. Troubleshooting How you respond to yellow leaves on your laurels depends on where they are growing. If they have only been growing in place for a few years, consider digging young plants up to improve the soil and/or replace them. Digging up a mature hedge is less practical: saving it is better. Good news: whether your soil is alkaline or not, or whether it’s compacted in that area, it is always a good idea to: Mulch the area around plants well. This both feeds the soil, and helps release compaction over time Prune the plants lightly, but stronger than a normal trim, to see how the leaves regrow while reducing pressure on the roots Where drainage is an issue, install suitable drainage trenches If you know your soil is chalky / alkaline, then go ahead and drench with a chelated iron foliar feed according to the instructions. And if they still don’t recover, replace them!
Read More
maiden-tree-no-stake
Backseat Driver
Planting
September 1st 2025 Blog

Backseat Driving: Do I Need To Stake A Tree?

Picking on Huw Richards Inspires Us to Make Better Tree Planting Videos At Ashridge, we feel a bit responsible for how well people plant trees. We are not the the Huw Richards police; we would never pick on him because he is YouTube famous and we want some of that. We totally agree with his main premise in this video: don’t bother adding compost to the planting hole. Rather, mulch well forever after. But in the name of sober shopping online, does that full size tree support stake, which costs a fiver, look like an appropriate size for that little maiden fruit tree? Honestly, it won’t anchor the tree any better than a 90cm bamboo cane, which costs less than 30p: a bigger cane is better, longer-lasting, but not essential. Having a big stake that tall for a small fruit tree is overkill, unless it’s supporting a really big tree guard, maybe, but no, it’s huge. Whether you use a big stake or a bamboo cane, you don’t need to tie a tree stiff as a post like Huw does above. You really aren’t holding the tree trunk up, you are mainly staking in order to prevent the roots from being rocked by wind in years 1 & 2. With the roots all set, the trunk can grow well unsupported.By year 3’s early Autumn winds, the roots should be deep enough to stand on their own, and the bamboo underground will have rotten. An 80-90cm bamboo pole, sunk 40-50cm into the ground, can be tied a few inches above the graft union point on the tree In the diagram, most of the fruit tree’s trunk is clear above the support stake / bamboo. It’s free to wave in the wind without bumping into its support.That is a good thing: flexing of the trunk makes the wood hunkier. Note that the tie should be several inches above the graft, not on or right above it. But I Am Growing In A Very Windy Location If you are growing trees in a wind blasted, exposed location, you are already a specialist in the challenges. People go for different wind management strategies, double staking is a popular one. OK That’s a Small Maiden Tree, What About A Bigger Half-Standard or Bush Size Tree? If you were to plant a tree in a sheltered courtyard with no support, it should be fine: if no one jumps on it. The support stake is there to protect the tree from strong winds and a degree of human or animal bumping, for the first couple of years. The stake not only could, but ideally should come off in the third year, unless there was a problem. Strong winds hit most, but not all, gardens. Therefore, we recommend that most people plant trees in larger sizes with a stake, most of the time, and yes, we are literally selling them.
Read More
summer sun
Pollination
September 1st 2025 Blog

Partial Self Fertility in Fruit Trees Like Summer Sun

One of our customers, M, got in touch with a fruit tree pollination question, asking about the difference between: Not self-fertile Partially self-fertile Self-fertile M had bought a Summer Sun cherry tree, and noted that the RHS said she’s partially self-fertile, whereas we clearly state that she’s practically kinda almost self-fertile. Other top garden sites like Garden Focused lean toward our nuanced assessment: Summer Sun is sometimes described as partially self-sterile but will produce a good crop even as a standalone tree. It can almost be considered as fully self-fertile. Pollination Testers Put a Bag On It We don’t mean to be crude about this, but it comes down to putting a light, airy cloth bag over the flowers so bees and other bugs can’t get them. When the flowers are full, a pollination tester would reach in the bag with a brush to twizzle around inside the flowers, simulating a bee moving the pollen, then tie up the bag again. Not self-fertile: No fruit will form Partially self-fertile: Fruit will form, but the crop will be small. The fruit are often normal, but might be poorer in flavour/texture/size, or misshapen Self-fertile: Normal size crops of good fruit will form. However, they can usually be improved further by pollination We have not bag-tested Summer Sun ourselves, but the word on the street is that it’s at the high end of partial self-fertility, producing decent, but not big, crops of normal fruit with no partner. Stella Cherries Are Everywhere..And So Are Other Pollination Partners! Summer Sun is a smashing cherry, and it has the bonus feature of being a highly compatible pollination partner for Stella. Stella is one of the most popular cherries in Britain, so chances are high that one is nearby! So, in practice, Summer Sun works out to be “effectively self-fertile”, meaning you can have just the one cherry tree in your garden, and it should get the pollen top up it need from neighbours to crop really well.
Read More
Trim Lavender Around Late February / March
Pruning
Spring
September 1st 2025 Blog

Trim Lavender Around Late February / March

This post is a bit late for getting in a February trim, but since the weather has been fresh and plants slow to wake up, we got away with it. Our school of thought on clipping Lavender is to do it twice a year: A light trim in late February / early March A hard prune after flowering, sometime in August The first trim needs to be done by early March. This tidies up your plants for Summer, removing tatty Winter growth, and encourages lots of flowers. Leaving it later will delay flowering, reducing the total amount of flowers over the season. Are You Telling Me I Shouldn't Hard Prune Lavender In Early Spring? In most of the UK, Spring isn't the ideal time to give Lavender its hard prune, in our opinion. But if you need to prune, then prune! Cut down to above the last leaf bud if you have to. Gardeners in warm Cornwall and glasshouse growers often prune their Lavender Continental Style, which means to hard prune at the end of Winter, so the previous year's flower stalks remain on the plant for winter interest. Do I Trim New Lavender Plants? Lavender planted last year must get the same treatement as mature plants. It is usually fine, often preferable, to let a shrub settle in for its first year with little or no trimming. But not Lavender. By shaping it when it's still small, lots of leaf buds develop low down into a strong base for the future. Pruning Lavender Every Year Keeps It Looking Nice With Lavender, as so many plants, it is not so important how you prune, but it's really important that you prune. Otherwise, the plant gets loose, gappy, and flowering declines.
Read More
nick-turrel-rhs-dead-hedge
September 1st 2025 Blog

RHS Dead Hedge In The City Video

The RHS has produced a dear little video that very sweetly promotes hedges over fences on the basis of their usefullness and environmental value. On a debatably even sweeter premise, I will offer my dear little criticisms in the traditional manner of my people, the backseat driving folk of Somerset: This is how we all drive in the West Country RHS Horticultural Advisor Nick Turrell seems like a lovely chap, and his video starts off with a nice framing story about needing to hide some bins at the back of his film set garden. All very believable, and it introduces the point well: fences are tacky and make your bum look big, while hedges are glamourous and make the other girls jealous. But Nick masterfully injects dramatic tension into this tidy picture: luxurious hedges, for all their supreme elegance, take time to grow, while frumpy fences have the trump card of instant separation gratification. When I really don’t want to look at something, I literally don’t want to see it again. To help sell the hedge, Nick repeats that old chestnut about hedges reducing road noise, and shares some interesting research about the best hedges for capturing air pollution, which include Yew, Thuja plicata, Elaeagnus (we only stock the decidious species at time of writing), and above all evergreen Cotoneasters with their hairy leaves. If you thought that was interesting, you will love Evaluating the Effectiveness of Urban Hedges as Air Pollution Barriers by Blanuša et al, which famously found that “only hedge depths in excess of 2m were found to noticeably reduce the concentration of fine particles in species with less capacity for particulates’ capture”, whereas effective species like Cotoneaster achieved useful results in 1.5m wide hedges. He explains out that hedges are essential for wildlife, which is great if you like spiders, and roots are better than concrete at absorbing water. By this point, Nick has so sold the advantages of hedges over fences that I’m starting to look out the window and wonder how much a dry stone wall would cost. But Nick, master storyteller, snatches my attention back from the brink with the big reveal: While your hedge is reaching the desired size, you block the view of whatever eyesore was bothering you with the lesser eyesore of a wall of dead sticks bound as a “hedge”, but also technically a fence, ideally on the North or East side of the hedge so as not to block the light. Nick’s resourceful answer to “fence or hedge” is “both, and cheap”. Dead hedging is a very common practice when hedgelaying out in country. You don’t see it much in the city, but that only makes it trendier. Building a deadhedge could even make you more popular with the neighbours who pay their gardeners to remove woody green waste, that’s a little van load of debris there. But a dead hedge “could be prettier”, which is polite for “it looks like a pile of dead sticks in front of some garden bins”. A dead hedge will never look as lush as a hazel hurdle made from your own copse by old uncle Jack, but ol’Jack don’t hurdle for nowt, those things cost money. So, there is one proven way to make things prettier: buy more pretty things to put on top of them. If your dead hedge gets a decent amount of sun, it’s an ideal support for our sweet pea seedlings to scramble over without delay.
Read More
Load more