Contents
- 1 How Many Times a Year Should I Prune Lavender?
- 2 How Should I Prune a Young Lavender Plant?
- 3 When Should I Prune English Lavender?
- 4 What Is the Spring Tidy-Up and Should I Do It?
- 5 When Should I Prune Dutch Lavender (Lavandin)?
- 6 How Do I Prune French Butterfly Lavender?
- 7 Can I Save an Old, Woody Lavender?
- 8 Should I Deadhead Lavender?
- 9 What Are the Most Common Lavender Pruning Mistakes?
- 10 When Should I Prune Lavender in the UK?
- 11 Can I Prune Lavender in Spring?
- 12 How Hard Can I Cut Back Lavender?
- 13 How Do I Prune Woody Lavender?
- 14 Should I Prune French Lavender Differently from English?
- 15 When Should I Prune Dutch Lavender (Lavandin)?
- 16 Can I Prune Lavender in October in the UK?
- 17 What Happens If I Don’t Prune Lavender?
- 18 Related Products
Lavender is the most underpruned plant in the UK. People are afraid of cutting into the brown wood, and so they give it a polite trim with the kitchen scissors and hope for the best. Do that, and in a couple of years, your hedge will be looking scrawny. Carry on, and you’ll be replacing it in four to five years, which is less than half the time it should look good in less-than-ideal conditions.
Many plants do best when pruned hard. Many gardeners are nervous about cutting off too much. You can probably see where this is going; Don’t be afraid to cut lavender back very hard indeed. It has an ill-deserved reputation for being an untidy, short-lived sub-shrub, largely because it is not pruned enough.
This guide covers when to cut back lavender, be it English, Dutch (same but different timing) or French (just different) including:
- The two annual prunes; one hard and one tidy up.
- Deadheading
- What to do with straggly Lavender
Our guide to growing Lavender is the place to go for advice on planting and general aftercare. We can also help you if you aren’t sure whether to go English, French, or Dutch.
Related guides
- Harvesting Lavender Flowers
- How to grow lavender — planting, feeding, soil and year-round care
- How to Water Lavender — When, How Often, and How Much
- Is Lavender Native to the UK?
- Is Lavender Safe for Cats and Dogs?
How Many Times a Year Should I Prune Lavender?
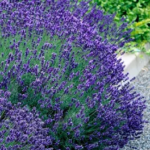
English and Dutch lavender need two prunings a year. One cuts the frame back hard. This stops the plant from spreading and looking as if it has a centre parting. The second cut, roughly six months later, is more of a trim, keeping it neat and helping to produce more buds for a better summer show. Think of the hard prune as creating the frame, and the trim as maintaining it. Both are annual, and neither is optional if you want your lavender hedge to look good for the next decade.
French Lavender is slightly different. It also gets a hard prune, just like English and Dutch lavender. But there is no other second pruning. Instead, during the growing season, because it flowers so freely, it’s more a question of deadheading than anything else.
How Should I Prune a Young Lavender Plant?
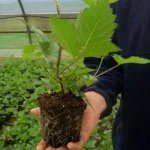
Young lavender in its first year — our P9s for example — is best “pruned” by pinching out the soft growing tips with your fingers rather than cutting. This “stops” young branches near the centre of the plant. While healing, these thicken and begin to make the woody framework the plant needs to support a good flowering display. Pinching out also encourages bushier growth from the base. If you can keep the base well furnished from the start, your plants will hold their shape for years. Once the plant has established and had a full flowering season, stop pinching and start cutting with the annual regime described below.
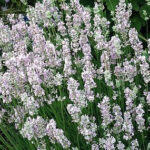
When Should I Prune English Lavender?
Most English lavender varieties finish flowering by mid to late August. Hidcote and Munstead are typically done by mid-August in the south, a week or two later further north. Don’t wait for every last flower. A really good indicator is when the bees have moved on. Then it is time to prune. If you are a bit late, then doing it in September is OK. However, October is too late; new growth won’t harden off before the first frosts. Never prune English lavender in winter. The plants are dormant, and the wounds don’t heal, which invites all sorts of disease.
If you’re in Scotland or northern England, try to finish by mid-August. New growth needs at least four to six weeks of “growing” weather to harden off, and winter comes earlier the further north you go. In the south, you can prune as late as the third week of September.
The Three Eights
Here is an easy way to remember what to do. At the end of August (the eighth month), cut your lavender back to about eight inches tall (about 20cm) by eight inches wide. For the great majority of UK gardeners growing English lavender, that’s all you need to know. Dutch lavender is backwards. Do exactly the same, but in spring, not autumn. See below.
When your lavender is 60cm (2ft) tall, eight inches sounds like a massacre, but a lot of that height is actually flower spike, so it is not that brutal. Even so, when you are done, your plants will look a bit the worse for wear. But those little green shoots at the base of each stem — the ones that have been struggling to reach the light all summer — now benefit from the sap that is still rising. They will grow on strongly, so by the time winter arrives, your lavender will be back to its hummocky best.
The rule about where to cut is equally simple: always leave green. If you can see small green shoots or leaf buds below where you’re cutting, pruning pushes them into growth. If the stem below your cut is bare wood with no visible buds, you are cutting back too hard, as no shoots means no plant next year. Unlike many shrubs, lavender generally does not regrow from budless old wood.
So don’t be shy. It is a truism that the harder you prune (within the green zone), the longer the plant will last. With lavender, pruning really is the key to a long and happy life. A well-pruned English lavender can give you fifteen to twenty years. With only light trimming, expect closer to five.
Lavender is tough, so use sharp shears or secateurs (we use a small hedge-trimmer), and cut the whole plant or hedge in one go — treat it as a haircut, not a trim of individual stems. After pruning, leave the plant alone. No feeding or watering is needed unless conditions are genuinely dry.
What Is the Spring Tidy-Up and Should I Do It?
In late February or early March, give your plants a very light trim. The aim is to remove any soft growth that appeared over winter. You are shaping; removing frost-damaged floppy growth, not pruning. This trim helps the lavender bush grow out evenly, which maximises bud production, and you can guess the rest.
If you missed the August pruning window, you can do a harder cut in March, but the “always leave green” rule applies. March pruning is a rescue, not a recommendation. The August prune is always better as the plant has time to put on the new growth that protects it through winter.
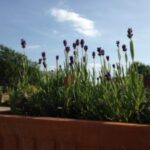
When Should I Prune Dutch Lavender (Lavandin)?
Dutch lavender (Lavandula × intermedia) flowers later and longer than English lavender — varieties like Grosso, Phenomenal, and Vera often flower well into September or even October. This changes the pruning timing significantly.
For most Dutch lavender, the flowers are still going strong when English lavender is being pruned in August. Don’t sacrifice the late flowers by pruning early. Instead, remove just the flower stems once they finish — strip them off cleanly but leave the foliage intact. Then do the hard foliage prune in March, when the sap is rising and the plant can respond with strong new growth.
This is the opposite of English lavender, where March pruning is a fallback. For Dutch lavender, March is the right time. Be just as firm with the cut — down to eight inches, always into green — but do it when the days are lengthening and the soil is warming.
It’s particularly important to prune Dutch lavender hard. The plants are bigger and more vigorous than English types, and they can become unmanageably woody if left to sprawl. Grosso in particular will reach a metre across in a couple of seasons if not kept in check.
One exception: if your Dutch lavender has particularly soft, silvery foliage — a sign that Lavandula lanata is in the parentage — go gentler with the pruning. These softer-leaved types don’t bounce back as vigorously from a hard cut.
How Do I Prune French Butterfly Lavender?
French butterfly lavender (Lavandula stoechas) flowers from spring right through to autumn, which makes timing the prune more difficult — there never seems to be a gap. The solution is to prune hard immediately after the first main flush of flower, typically in early to mid-July.
Cut back to about eight inches (20cm), the same as you would for English lavender. Then deadhead spent blooms as they go over through summer, encouraging further flushes. Stop at mid-September and leave the plant alone. The foliage is its winter protection — any pruning after that point removes the very growth that gets it through to spring. Resume only once new growth is visible the following year.
French butterfly lavender is naturally shorter-lived than the English and Dutch types. Expect five to ten years from a well-maintained plant; less in cold or exposed gardens. If you’re growing it in a pot — which is the best approach in most of the UK — the same pruning rules apply, but you can be slightly more conservative since the plant is already protected by being movable.
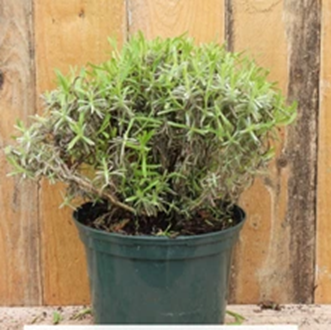
Can I Save an Old, Woody Lavender?
Sometimes, but not always. If the base of the plant is completely bare brown wood with no green shoots visible anywhere on the lower stems, the honest answer is that it probably won’t come back. Lavender doesn’t regenerate reliably from old leafless wood, and a hard cut into bare stems usually kills the plant.
If you can see even a scattering of small green shoots low down on the stems, there’s a chance. Downderry Nurseries in Kent — for decades the unquestionable authority on lavender, sadly now closed — advised pruning to within a hand’s width of the bare wood and seeing if this encourages sprouting further down the plant. If it does sprout, repeat the same treatment at the next prune, gradually working downward until you can’t see the ground beneath the plant any more. Over several seasons you may renew the whole framework.
Be realistic about the result. If the plant looks like a bare stick topped with a tuft of foliage, it’s often more satisfying — and quicker — to start fresh. A young plant in good condition will outperform a struggling old one within a single season, and unlike roses, lavender has no replant disease. You can plant the new one straight into the same spot — remove the old root ball, swap in some fresh soil from nearby, and the new plant will establish as if nothing was there before.
Should I Deadhead Lavender?
If you’re growing lavender for cutting, harvest the flower spikes when the buds are fully coloured but before the individual florets have opened — this gives the longest vase life and the best colour if you’re drying them. Cut the stems long, right back into the foliage, and you’re effectively doing the annual prune at the same time.
If you’re not harvesting, you can deadhead spent flower spikes through the season to keep the plant tidy and encourage a second flush on some varieties. But deadheading is not a substitute for the hard prune — it removes the flowers but doesn’t reshape the plant or keep the base compact. The August prune still needs to happen.
There is one exception worth considering. If your lavender is well established and healthy, you can leave the spent flower heads on towards the end of the season. Goldfinches love lavender seeds, and watching them work their way along the stems is one of the quiet pleasures of an autumn garden. The trade-off is simple: the plant won’t put energy into a late flush of new growth, and you’ll need to do the hard prune the following spring instead. One season of seedheads is a gift to the wildlife. Just don’t make it a permanent habit, or the plant will go woody.
What Are the Most Common Lavender Pruning Mistakes?
Not cutting hard enough. A light trim in August achieves very little. The three eights rule exists because it works — eight inches is the target, not a worst case.
Cutting too late in autumn. October pruning doesn’t leave enough time for new growth to harden before frost. If it’s past the end of September, leave it and do the spring tidy-up instead.
Pruning in wet weather. Lavender doesn’t like being cut when it’s soaking wet. The combination of open wounds and moisture is an invitation for fungal problems. Pick a dry day.
Using blunt tools. Shears or secateurs should be sharp and clean. A ragged cut invites disease. If you’re pruning several plants, wipe the blades between plants with a cloth dipped in diluted disinfectant, especially if one plant looks unhealthy.
When Should I Prune Lavender in the UK?
Immediately after flowering — late August or early September for English lavender. Dutch lavender (Lavandin) is different: remove the flower stems when they finish in autumn, then do the hard foliage prune in March. French butterfly lavender gets pruned hard after the first main flush in July, then deadheaded through summer.
Can I Prune Lavender in Spring?
A light tidy-up in late February or March is fine — removing soft winter growth and frost-damaged tips. A hard prune in spring is a rescue option if you missed August, but it’s not as effective because the plant has already spent winter exposed and leggy. For Dutch lavender, March is actually the correct time for the hard prune.
How Hard Can I Cut Back Lavender?
Down to about eight inches (20cm) from the ground — the “three eights” rule. The crucial thing is to cut above at least one set of visible green shoots or leaf buds. These buds may be small, but they must be there. Cut below them into bare brown wood and the plant won’t recover.
How Do I Prune Woody Lavender?
If you can see green shoots low on the stems, cut back to within a hand’s width of the bare wood and see if it sprouts. If it does, repeat at the next prune, gradually working downward. If the base is completely bare with no green shoots at all, replacement is usually a better option — lavender doesn’t reliably regrow from leafless old wood.
Should I Prune French Lavender Differently from English?
Yes — French butterfly lavender flowers from spring to autumn, so prune hard after the first main flush (typically July), then deadhead through summer. English lavender flowers once, so prune once in August. Technique is the same; timing is different. See Pruning French Butterfly Lavender above for full details.
When Should I Prune Dutch Lavender (Lavandin)?
March — the opposite of English lavender. Dutch lavender flowers later and stays colourful into autumn, so the hard foliage prune waits until the sap starts rising in spring. See Pruning Dutch Lavender above for full guidance on Grosso, Phenomenal, and Vera.
Can I Prune Lavender in October in the UK?
October is too late for most UK gardens. New growth that emerges after an October prune rarely has enough time to harden off before the first frosts — those soft young shoots are the most frost-vulnerable part of the plant. If October arrives and you haven’t pruned, leave it. Do the light spring tidy-up in late February or March instead, and get back on schedule with the August prune the following year. See when to prune English lavender for the full timing.
What Happens If I Don’t Prune Lavender?
It will still flower, but the plant becomes progressively woodier and barer at the base, eventually splitting open under its own weight. After three or four years without pruning, recovery is very difficult. The annual prune keeps the base green and the habit compact — it’s the single most important thing you can do for a lavender’s longevity.
Related Lavender Guides
- How to Grow Lavender — planting, soil, watering, and general care from the ground up.
- Types of Lavender: English, French and Dutch Explained — the real differences between the three groups, from hardiness and scent to the best use for each.
- How to Water Lavender — how often to water lavender in the ground and in pots, and why less is almost always more.
Browse our full range of lavender plants for sale, or see our top picks for open garden planting. For English lavender varieties including Hidcote and Munstead, see our English lavender collection. For Lavandin varieties including Grosso and Phenomenal, see our Dutch lavender collection.


Leave a Reply