


October 16th 2025•
Hedge Plants
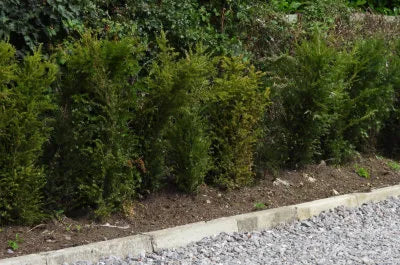
How to Trim a Garden Hedge
Trimming a Hedge Means Two Different ThingsTrimming a Mature Hedge: Cut off practically all the n...
Read More
 Hand Picked, Delivered to Your Door!
09/02/2026
The bareroot planting season is from November to March, for most of the UK, usually into April in Scotland.
This film applies to all the mixed country hedge plants, which are planted bareroot in winter.
Hello and welcome to Ashridge Trees (Nurseries). This film shows you how to plant a mixed country hedge or a single species hedge such as Hawthorn or Blackthorn. Country hedge plants are always bare rooted, so the planting season is from November through to March (approximately) when they’re dormant.
For most large hedge plantings, they are delivered in smaller sizes, up to 80cm tall, ideal for the efficient slit, or slot, planting method.
The plants demonstrated in this video are our Conservation Hedge mix; our two species basic Countryside Stewardship mix is also popular.
Important Rootgrow Clarification!
The video above doesn’t show the valuable step, how to add Rootgrow Friendly Fungi.
Before you start, you will need a sprayer or watering can, if you’re going to use weed killer, a spade, sharp knife, canes and spirals if you have rabbits, polypropylene weed control fabric, string, a bucket, thorn proof gloves, a one-meter-long piece of wood, and on planting day, you will need your plants.
Apply a non-residual weed killer, following the manufacturer’s instructions, a minimum of four weeks before you intend to plant.
If the soil is soft enough for you to push a spade in full depth, then you do not need to dig the ground at all. If it is harder than that, then dig over short strips and rotovate long ones. Remove large roots and big stones.
We recommend the use of mulch fabric because it prevents weed growth, retains moisture and so promotes a healthier hedge. The best way of securing the matting is to tuck the edges in with a spade.
You’ll need to cut slips in the fabric a little wider than your spade, with a sharp knife.
Country hedges are best planted in two rows with six plants per metre of hedge. Because the rows will be staggered, this means you’ll need to cut three slits per metre in each row, marking out a piece of wood with 33cm spacings will help you to do this. Use the lines on the fabric to help you plant in a straight line.
If you’re not using fabric, you’ll need to use two sticks and a piece of string.
Take a selection of plants out of the wrapping and put the roots in the bucket of water and cut the strings on the bundles.
Push your spade to full depth through the first slit in the fabric. Push the handle of the spade forward to make a slot in the soil behind. Find the roots collar on the first plant. This is the point above the roots where it grew in the soil before it was lifted. Put the roots of the plant into the slot behind the spade, checking the plant is not too deep, and then holding the plant in place, remove the spade.
It’s important that the root collar ends up at slightly above ground level. If you plant too deep, the stem can rot. If you’re using canes and spirals for rabbit protection, push a cane into the slot as close to the stem of the plant as possible. Using the heel of your boot, firmly close the slot around the roots of the plant.
Hedge plants establish more quickly if there is a firm contact between roots and the soil. If you can pull out the plant held in between your thumb and forefinger, you’ve probably not been firm enough.
Now you have to cut back your hedge. Be brave. All thorn-based hedge plants should be cut down by half after planting, because this makes them branch low down, helping to create a bushy hedge. These instructions for cutting back do not apply to formal hedges, such Beech, Hornbeam, Box or Yew.
Spirals for rabbit protection come in nests of five. Pull a spiral from the inside of the nest and then wind it around a plant and cane, starting at the bottom and working upwards.
When you finish this planting, you will find that some of your beautifully tucked in mulch fabric will have come loose. Tuck it back in with your spade.
You’ve just planted your first country hedge. Well done.
Remember to water them correctly, your new plants need you – even British rain is rarely enough!
Remove weeds and grass, ideally in advance between July and September.
Use a weedkiller, or cut the weeds short and use our polypropylene weed control fabric to smother an area.
For short lengths of hedge, you can shave the vegetation off the ground with a spade, but you will need to keep an eye open to make sure persistent weeds like nettles and ground elder do not come back in strength.
Make sure you have received the hedging you ordered and that you are satisfied with its quality.
Bare rooted hedge plants should have a good ratio of root to shoot, but remember that hedging with bushy roots is harder to plant in quantity so we try to grow our younger hedge plants (up to 80cm) with slim roots.
Never use weak, damaged or diseased plants and always handle with care: some plants are thorny, and any whippy shoot can flick you in the eye.
Do not clip roots unless it is absolutely essential.
If you are going to plant within 7 days of receipt, there is no need to heel them in: keep them in a cool place in their bags.
If you are storing bare root plants for over a week, heel them into a trench at a 45-degree angle. Cover the roots with soft soil and firm lightly.
Hedging will keep for 8 weeks like this.
Always keep hedging in bags when moving it to prevent its roots drying out.
Don’t let hedge plants overheat, so leave them in bags in the shade and out of the wind (bag opening away from the direction of the wind) until the last minute when planting.
Never stack the bags.
Keep the roots damp until they are planted, but do not store them in a bucket of water and leave them there.
Dunking the plants for up to an hour immediately before planting is great, but more than about 48 hours can kill them.
Generally, the planting season starts when plants become dormant in November and ends in March, but in the far North of England and Scotland it can go on for about another four weeks. Good planting days are overcast and still, and a gentle drizzle is perfect as it will keep the roots moist during handling. If it is sunny and windy, keep the roots wrapped up until they go in the ground.
Never plant hedging when the ground is frozen or covered with snow: it’s not practical anyway, but worse than that it means the roots will be frozen. Freezing does not hurt them, but frozen roots are brittle and break when moved. Just leave your plants wherever they are stored until the ground thaws.
The default spacing for a single row hedge that is quickly secure against humans is 3 plants per metre.
If you are getting a hedging grant, the approval document will tell you the spacing: the default for the BN11 Planting New Hedges Grant is 6 hedge plants per metre in a staggered double row with 40cm between the rows, which will be stockproof.
For a loose wildlife hedge or copse, perhaps using an All Seasons Mix or Bird Friendly Hedge Mix, you could space plants out 50cm along a row and 100cm between rows.
Have a big bucket of water ready.
Take a bundle of plants out of the bag, cut any string / cable ties binding them, and put the roots in the bucket (note that is it is very good to wet the roots before planting, but don’t store them in a bucket of water for days).
Slit planting is the best method for bareroot hedging sized 60/80cm.
Push your spade into the soil to the depth of the roots.
Rock backwards and forwards to widen the slit.
Take a plant from the bucket, sweep the roots into the hole from one side without squashing them, so that the bottow of the roots are pointing downwards at the bottom of the hole.
For a bigger slit, cut at right angles to the first slit to make a T or L shaped notch.
Firm the soil back down around the roots well. Don’t damage the bark, but be really firm: using your thumb and forefinger, it should be very hard to pull newly planted hedging out.
It is important that the root collar finishes at or slightly above soil level (planting too deep kills plants).
With large numbers of plants, we recommend working teams of three: one to make the slit, one to insert the hedging plant and apply the mycorrizhae (sprinkling a pinch directly into the hole before putting the plant is probably the most convenient way), and one to firm the soil.
With a bit of practice, such a team should exceed one plant per minute. On a winter’s day with an hour for lunch, starting at 7am and finishing at 4pm, it should be possible to do 500 hedge plants a day. which equates to 83metres of double row, or 166m of single.
Pit or trench planting is necessary for bareroot hedging that has larger roots, generally on plants over 80cm tall.
Dig a hole big enough for the roots and centre the plant in the hole with the root collar just below ground level.
Replace earth (break up the clods and take out large stones).
Gently tug the plant so the soil settles around the roots.
Firm hedge plants in so the root collar ends up at soil level.
Remember:
Bareroot hedging (Nov-March Delivery), includes all country hedge plants.
Farmers usually want the cheapest option for native farm hedging:
For your garden’s native hedge, the conservation hedge mix, perhaps supplemented from the list below, is a popular choice with larger plants and more species.


Comments (0)
Add a commentLeave a comment
Please note, comments need to be approved before they are published.